
FAQ Series: Kit for Alpinism
Here we put together a kit list of equipment and clothing that will be useful as a starting point for any of our meets or trips.
It is important that you are familiar with your kit and don’t try and fit your crampons to your boots for the first time in a precarious position. Give yourself a fighting chance and spend some time stomping round the hills and climbing easy rock in your big boots plus make sure you know that your crampons are fitted to your boots and you understand the fiddly bits before you set off. Also make sure you sort your kit on return to the valley and fix any broken bits, you don’t want to pull it out of your bag on the hill and remember too late you were meant to fix that strap..!
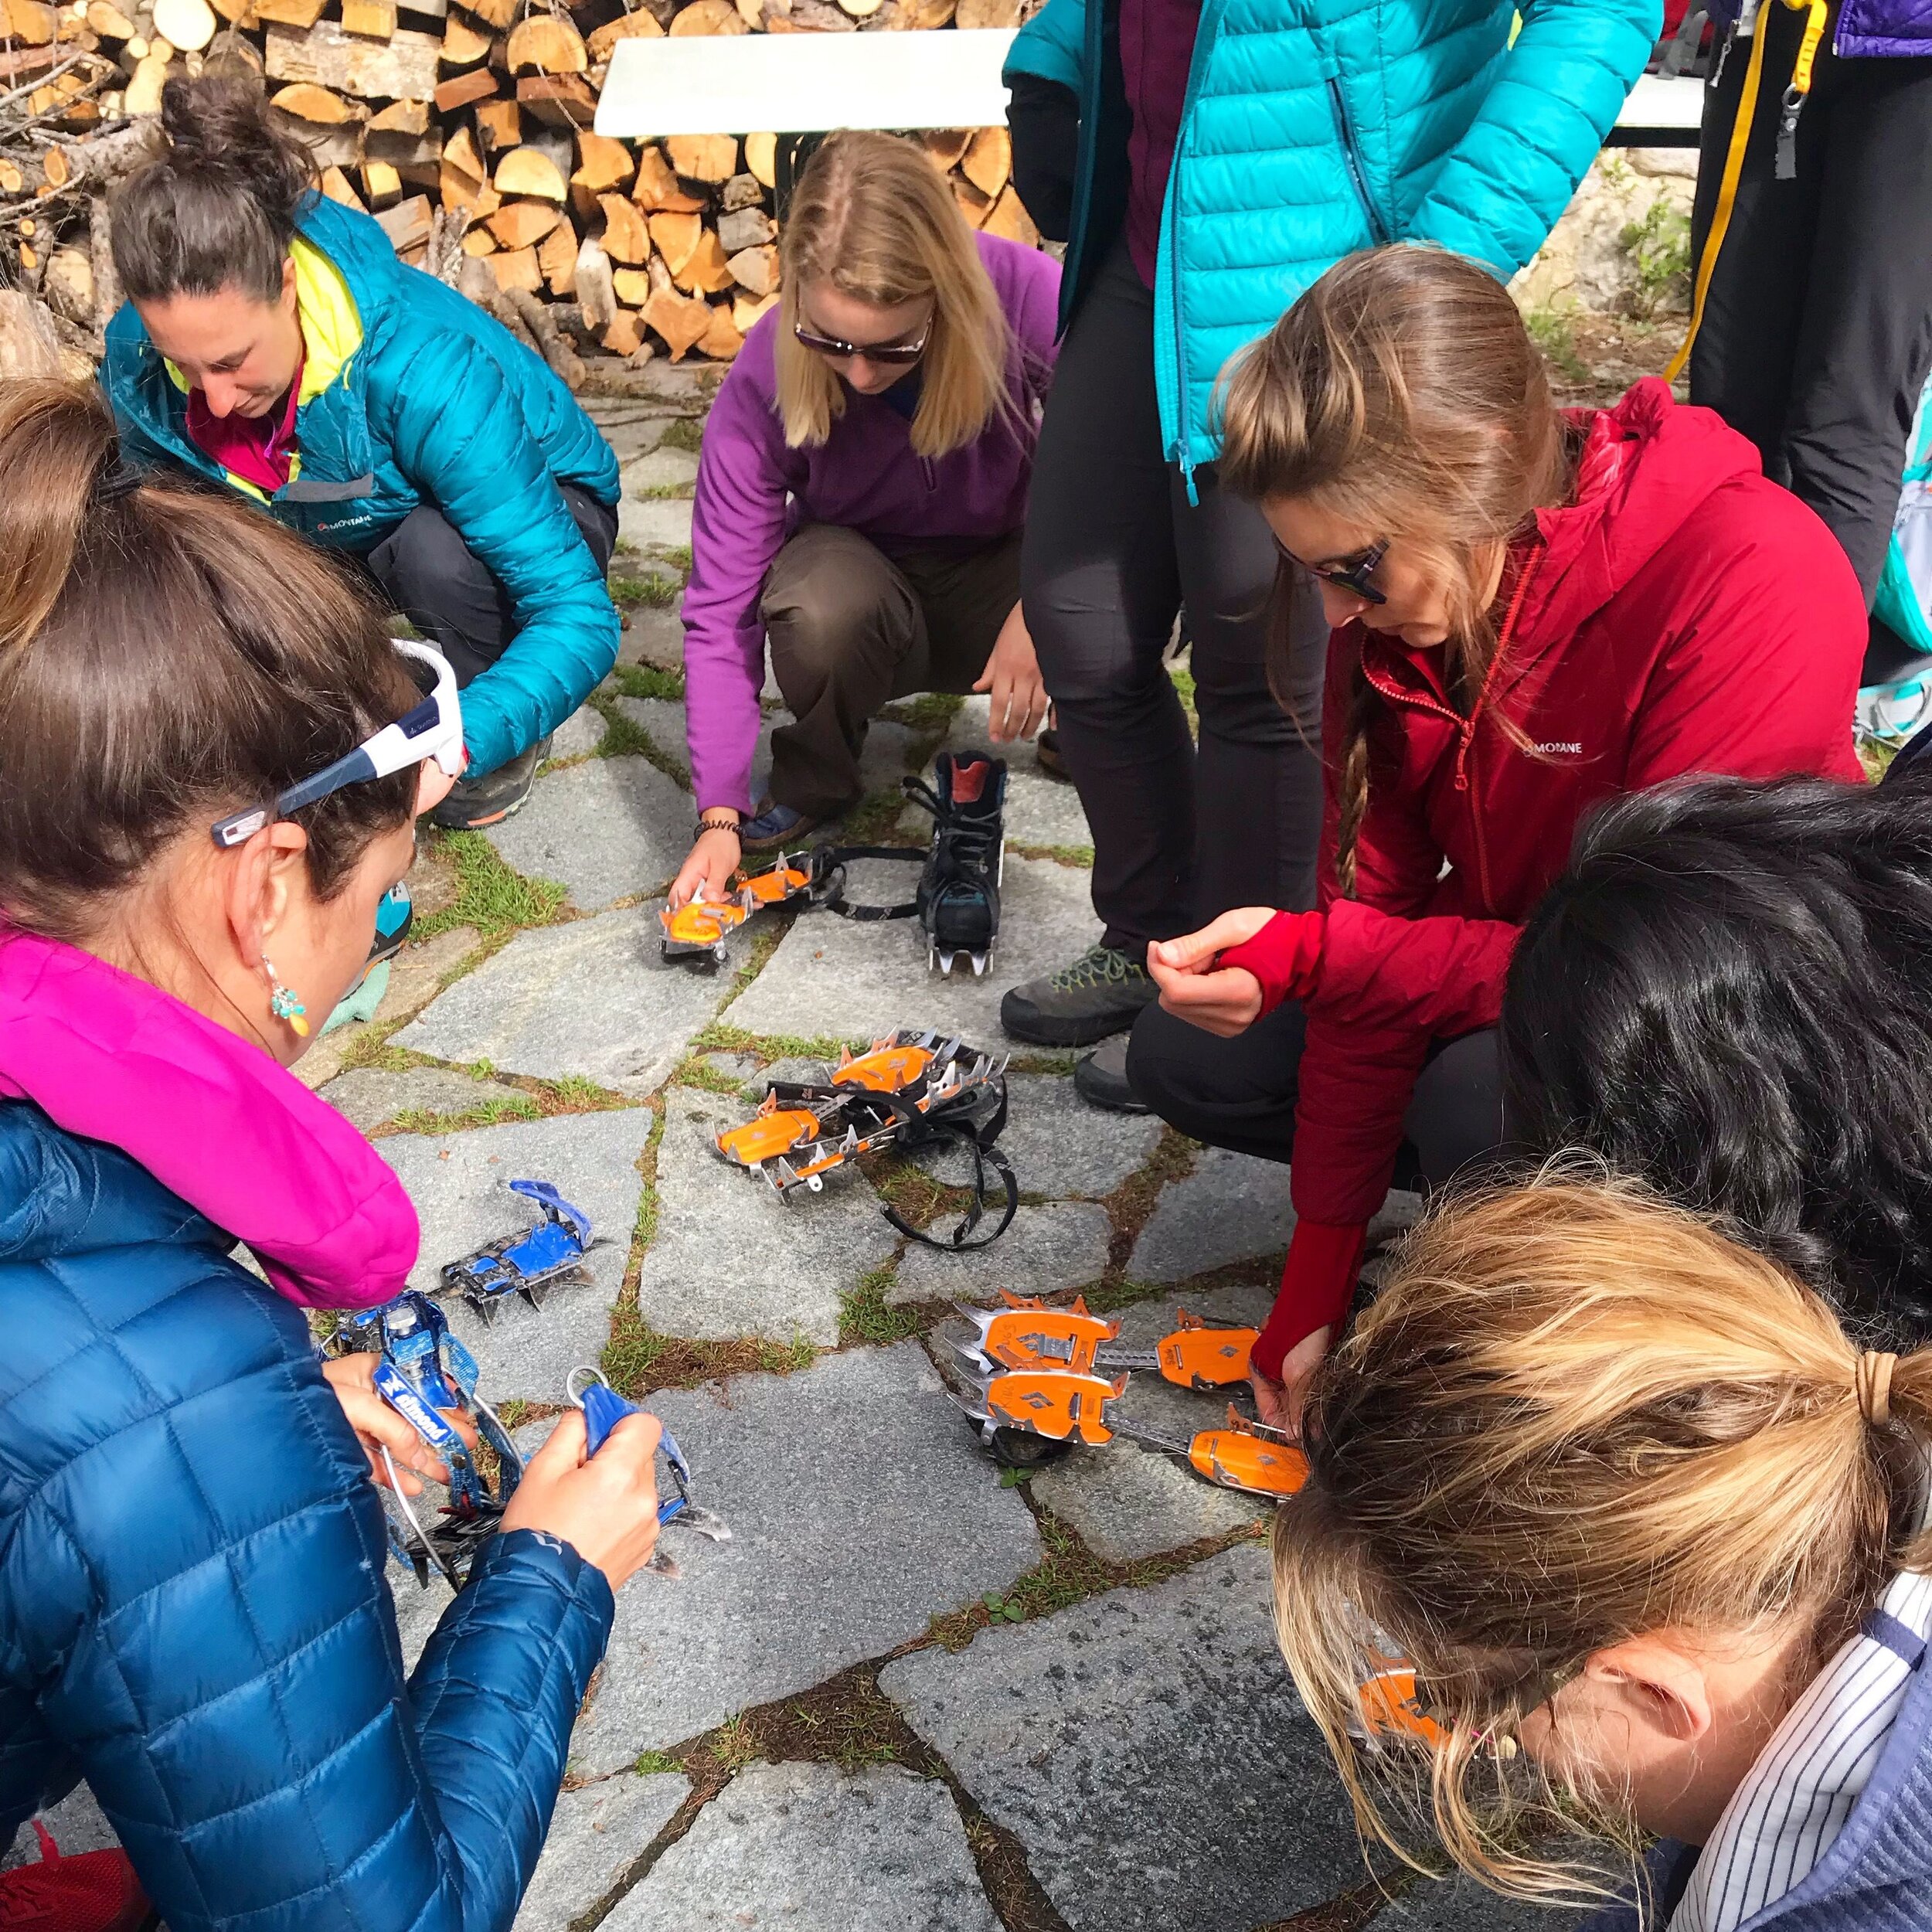
Getting to grips with crampons at the trail head in the Ecrins
Equipment
The route you choose will effect what kit you take with you, but the below list is a suggestion for routes up to PD that include glacial travel plus a rocky section. Once you move onto AD rock routes you may wish to take a full set of nuts, a couple more cams and more quickdraws/slings. If you have a ice section of route a couple of ice screws may be appreciated!
Glacier Travel - Harness, Helmet, Rope, Ice screws (medium and long), Axe, Crampons, x2 prussiks or mechanical devices, 3 screwgates (consider having one with a revolver) and slings.
Rocky peaks - a light alpine rack that includes some extendable quickdraws, half a set of nuts, a couple of cams. Belay device. 2-3 slings.
Group kit - group shelter, first aid kit, spare sun glasses.
If you are on long alpine bolted routes you will need ropes that are long enough for any rappels, enough quickdraws for pitches and a way of securing yourself to the belay efficiently. In the Plaisur Guidebooks, the topo will tell you what rope length and how many quickdraws needed. Sometimes if the route is ‘sportingly bolted’ you may need a light rack to calm your nerves on run outs!
Now we look at essential gear in more detail:
Boots - These are rated from B1-3 and correspond to crampon ratings of C1-3. This represents the stiffness. A B2 boot is often a good starting point for easier peaks at home and abroad and are easier to walk in as the sole has a bit more flex. These can be used with a C1 or C2 crampon. These boots are better on rock and a lighter and cooler. However, a B3 boot is much warmer and has a stiffer sole which is better for kicking steps and ‘edging’ on rock. It depends what kind of routes you plan on doing and the altitude you plan on getting to.

Boot options
Crampons - a 12 point crampon is a great do-all in the Alps. A C2 crampon has a heel clip and straps for attachment plus a flexible bar joining back and front. Therefore these are pretty versatile and easier to walk in.
Ice Axe - a general mountaineering axe tends to have an ‘adze’ on the back which is helpful for cutting steps, diggings and burying as an anchor. There are different shaped and length shafts and this mostly depends on what terrain you will be passing over. A longer ‘walking axe’ can be great on glaciers and snow plods, but has limited use when moving in steeper terrain. A 50-60cm shaft would cover most options, but on the shorter end is better for technical ground. The slight curve gives better aim and penetration and allows for more stable hooking.
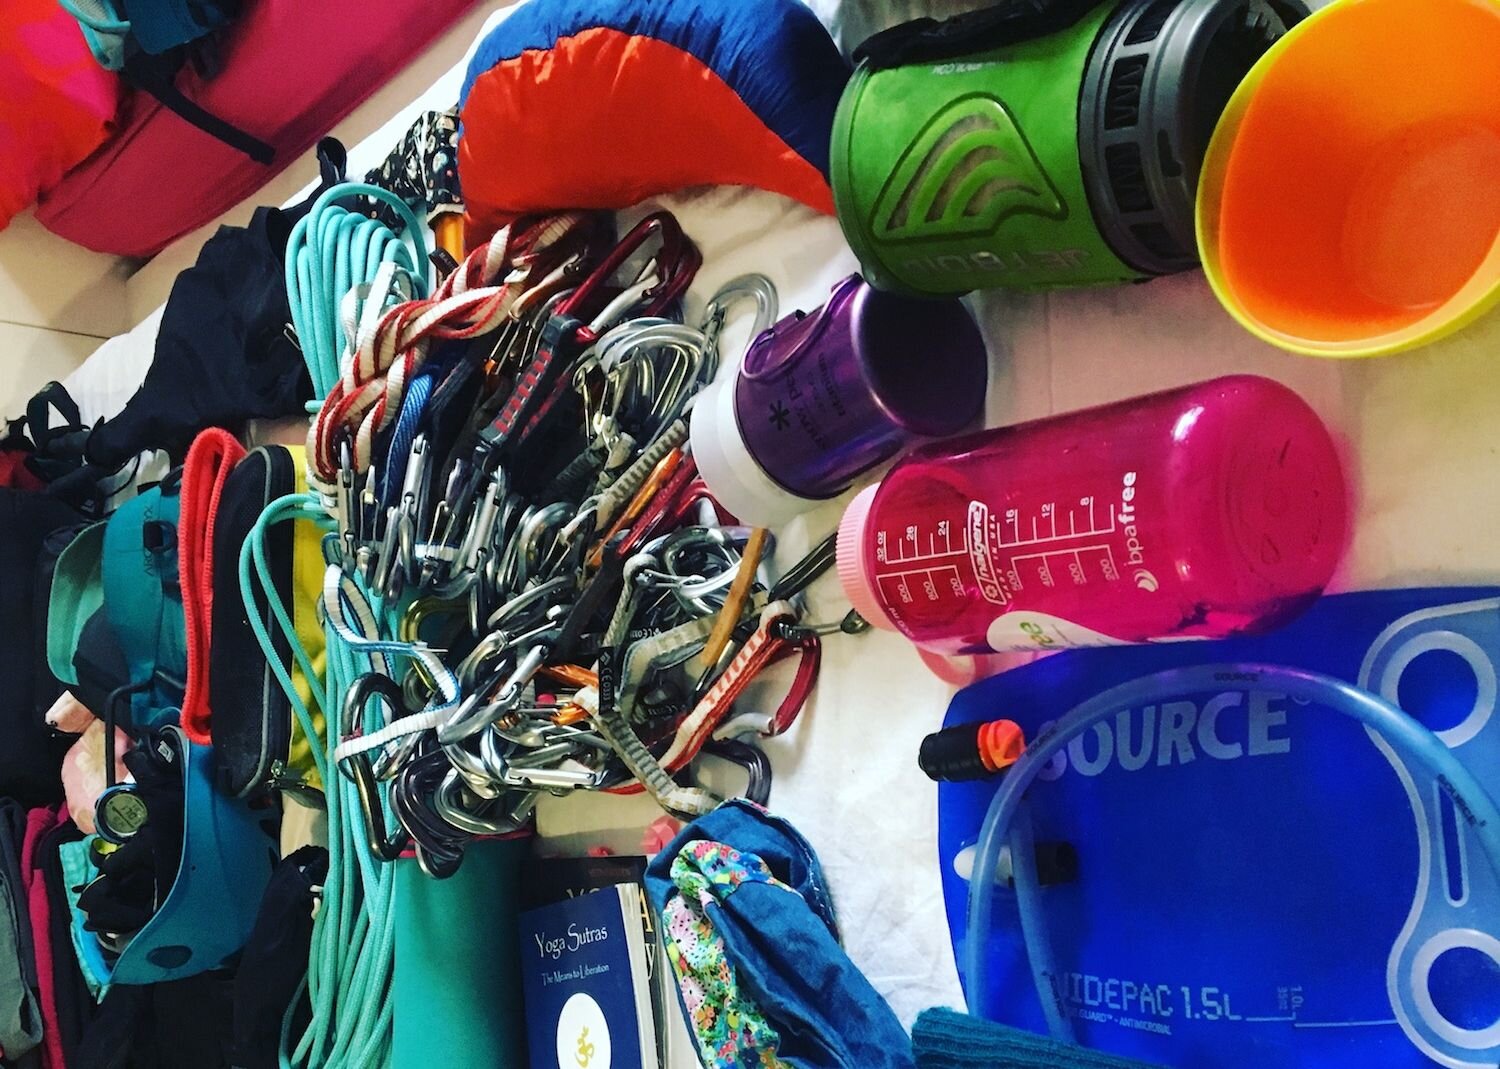
An alpine sport route kit pile
Personal Gear
Using a layering system works well in the Alps. Consider that you may be starting from the valley up to a hut, so may wish to walk in in different clothing. Think about be comfortable at the hut.
Boots and socks that work with those boots
Trousers - soft shell material
Base layer - thin and wicking to take moisture away from your body. light colours are preferable.
Mid layer - not everyone uses this, but as a cold blooded human I can’t just get away with baselayer plus synthetic jacket. I also have a down gilet that I often use.
Soft Shell Jacket - windproof, showerproof and robust (ie, doesn’t tear just looking at granite!)
Synthetic Insulated Jacket - This should be big enough to go over your synthetic jacket and this helps keep in heat. Down is warmer but doesn’t work as well when wet.

A typical Alpine Outfit
Waterproofs - I carry a thin waterproof coat and trousers that will go over everything else. These live at the bottom of my bag!
Gloves - the perennial quest for perfection! Have a thick pair and a thin pair. Make sure you can still tie knots and use gear with these on - something to practice on the sofa in front of the TV!
Also carry head torch, sun glasses, goggles, suncream (face and lips) and water bottle (at least a litre). I will use trekking poles (collapsible if I will be climbing) and always carry a multitool and duck tape in my bag.
Navigation equipment - map, compass (plus spare), GPS
Plus a rucksack to carry everything in! A 40-45 litre bag should be big enough. A gear loop on the waist belt is helpful and also a floating lid means you can put extra bits for the hut that will be left behind on the route on top.

Kit for glacier travel and easy peak